Customising subscription and unsubscription texts
When recipients subscribe to or unsubscribe from the newsletter, they are taken to a form confirming that the action was successful. Recipients reach this page either via a subscription or unsubscription form on your website or by clicking the unsubscribe link in the newsletter. You can customise both the design and the content of the following forms. The same editor is used as for designing the newsletter.
Opt-in: subscribing to the newsletter
| Form | Description |
|---|---|
| Information about the subscription and confirmation of the email address | This form appears when subscribing to the newsletter (e.g. via the subscription form on your website). |
| Confirmation of successful subscription / thank-you page | The user clicks the link to confirm the newsletter in the double opt-in email and is taken to this page. |
Opt-out: changing the email address, entering a pause or unsubscribing from the newsletter
| Form | Description |
|---|---|
| Changing the email address, unsubscribing or pausing the newsletter | The recipient clicks the link to change the email address or to unsubscribe from (pause) the newsletter. This link should be placed accordingly in every newsletter. See FAQ: How do I add an unsubscribe link to my newsletter? |
| Confirmation of the email change or unsubscription | The next page after the user has entered the new email address or asked to unsubscribe. |
| Confirmation of the pause / holiday | This page is shown when the recipient has entered a holiday period. |
Customising design & content
In the administration area you will find the forms under Integration -> Forms (opens in a new tab). Use the edit icon on the far right to go straight to the form you want.
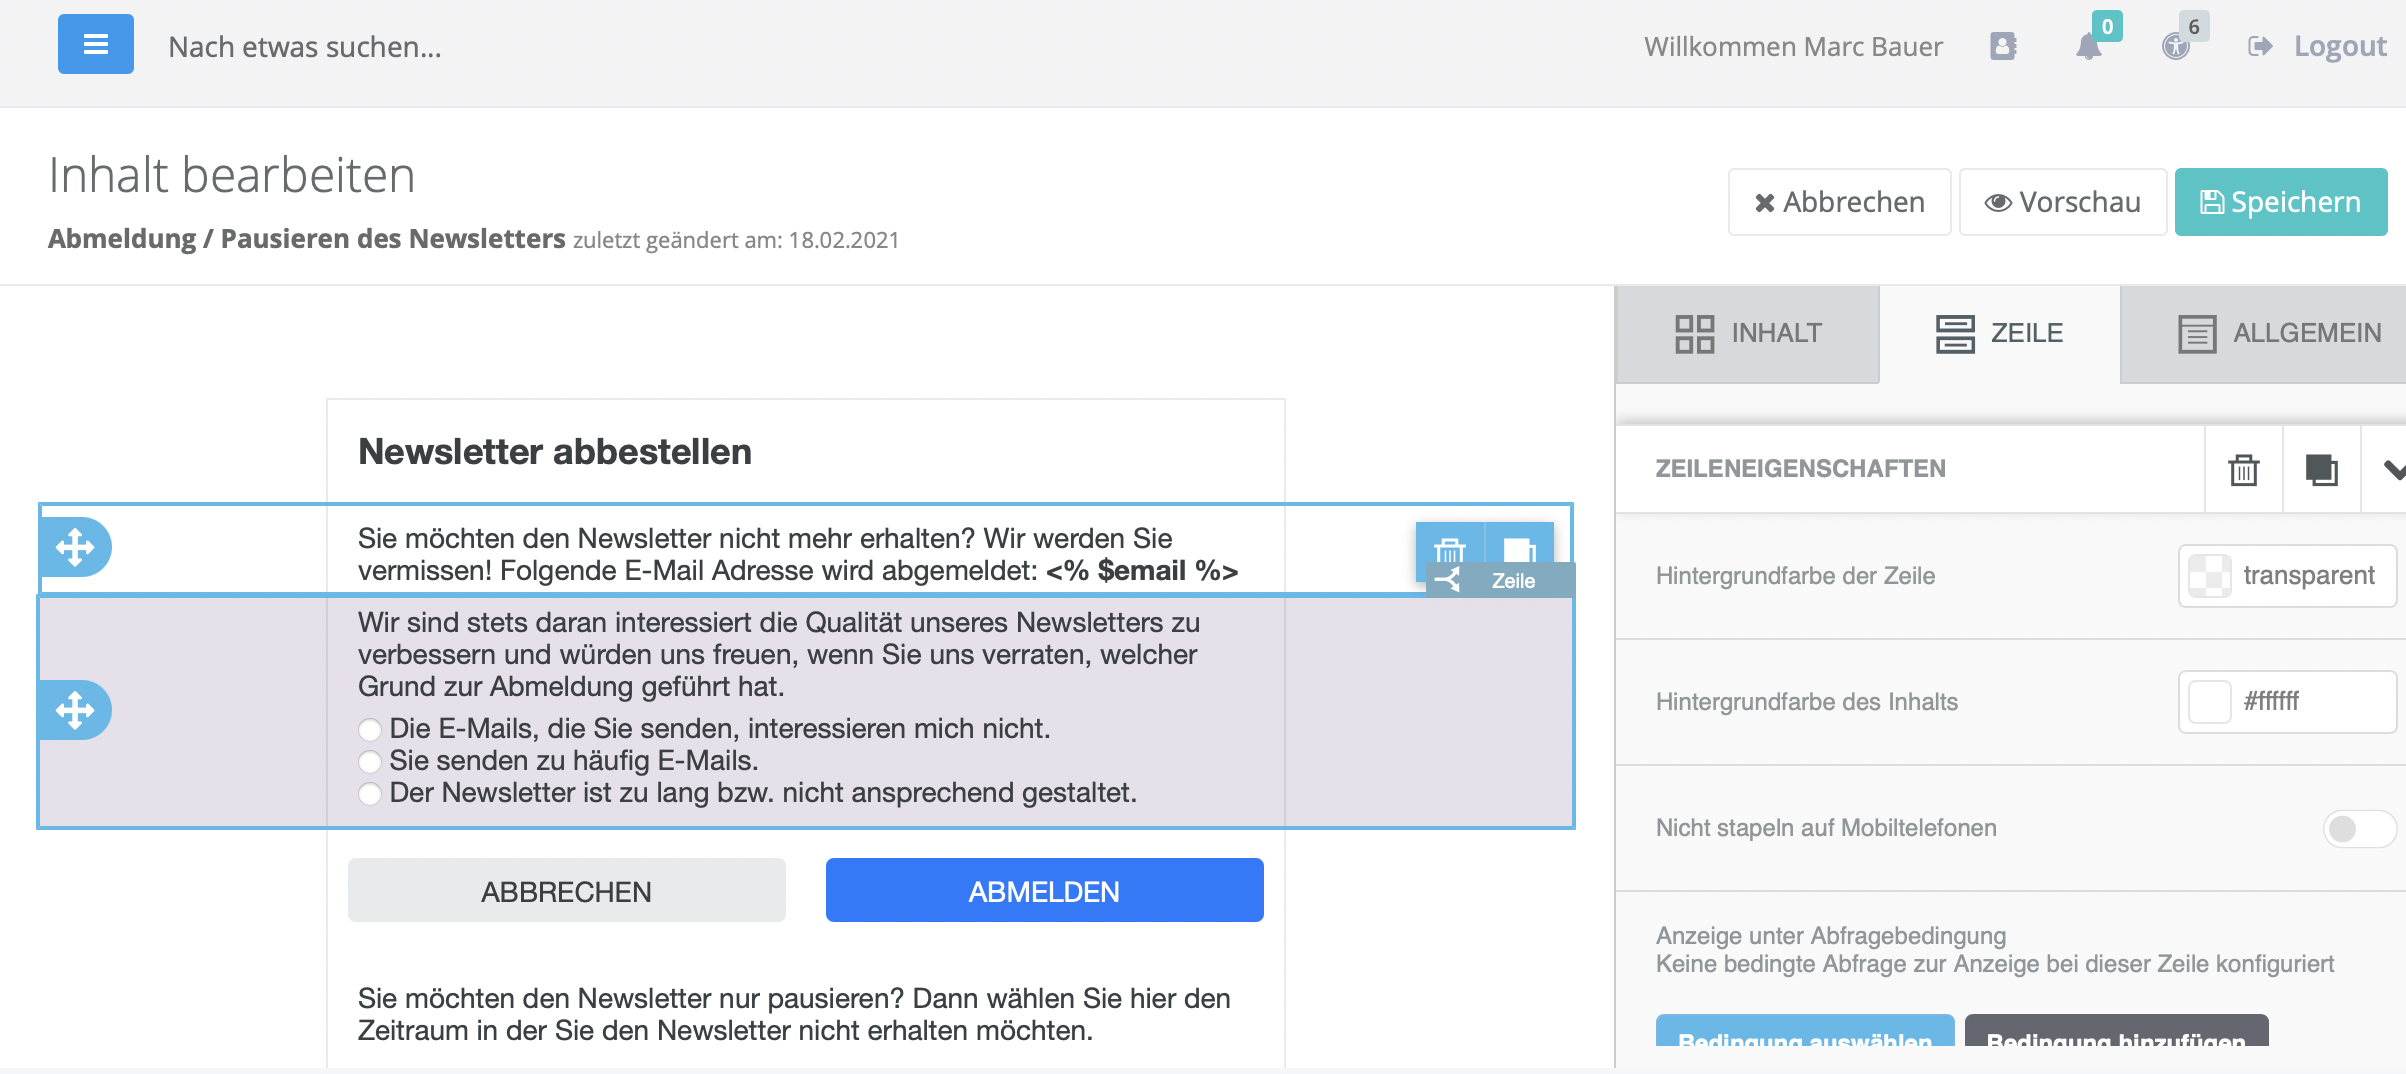
Display conditions
The "switch" icon (to the left of "Row") shows that a row has a display condition. The selected row is then only shown if a certain criterion is met. This can be, for example, the status of the subscription or unsubscription (successful or not successful) or membership of a particular list. With such a display condition you can implement different languages.
Adding the English language
As described in the FAQ (see: Can I send a newsletter in several languages), you can implement further languages either with a personalisation or with different lists.
To show the content in the form according to the language, edit the display condition mentioned above. To do so, click Add condition or Edit condition on the right. The following selection appears (example):
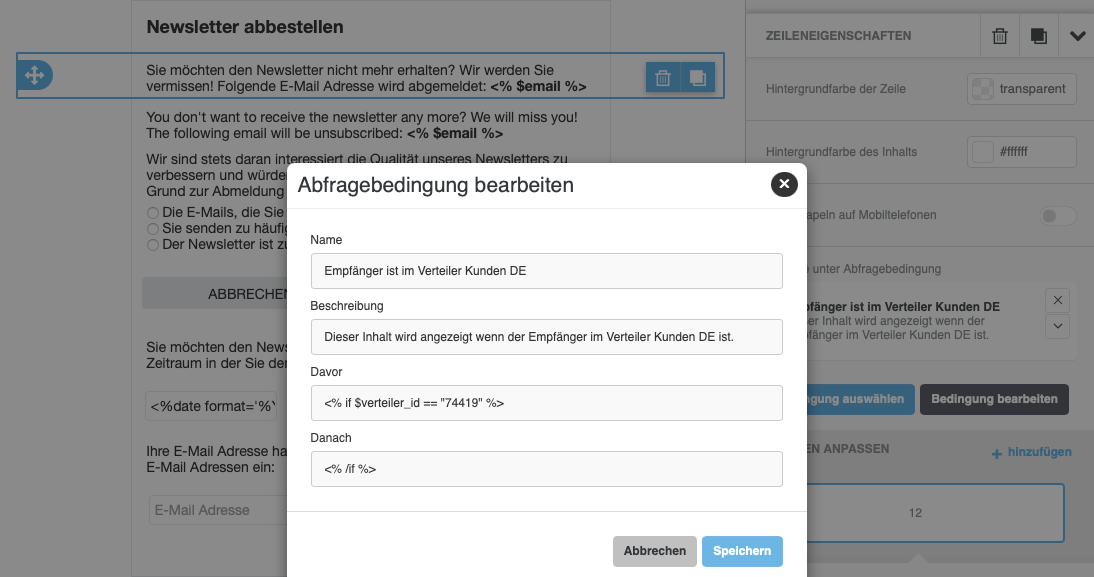
The content shown in this screenshot is only displayed if the recipient is on the list with the ID 74419 (customers DE). You can therefore duplicate this row and add the display condition for the English list:
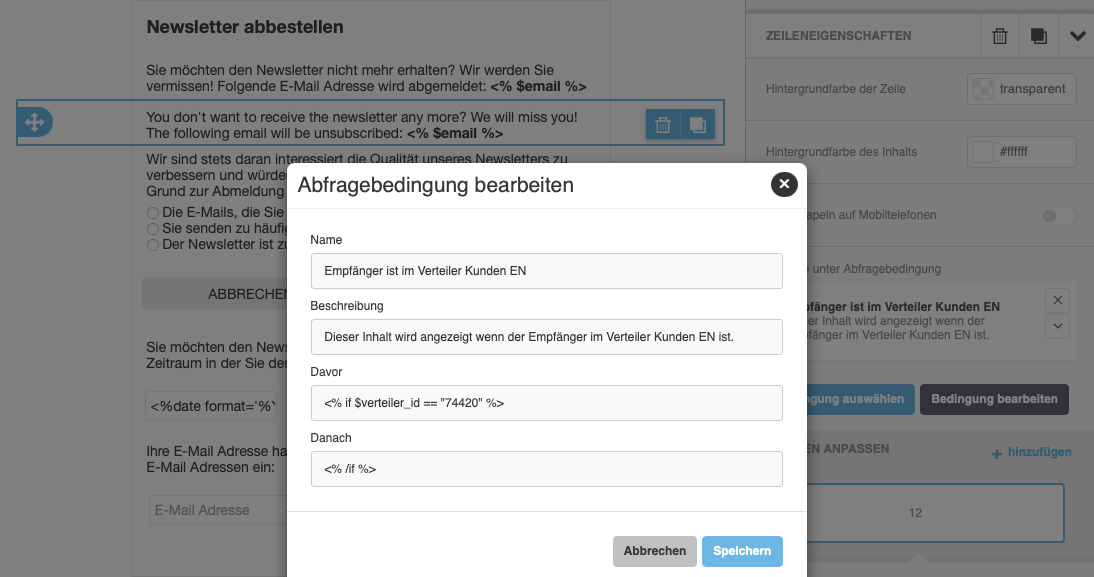
If you have stored the language as a personalisation (label: Language), the display condition (Before) could look like this:
<% if $p.Language == 'en' %>
The display condition can also be extended if you have more than one list for the English language:
<% if $verteiler_id == '74420' || $verteiler_id == '74421' %>
Some forms may already contain a display condition for the status of the subscription or unsubscription. In this case you can simply extend the display condition as follows:
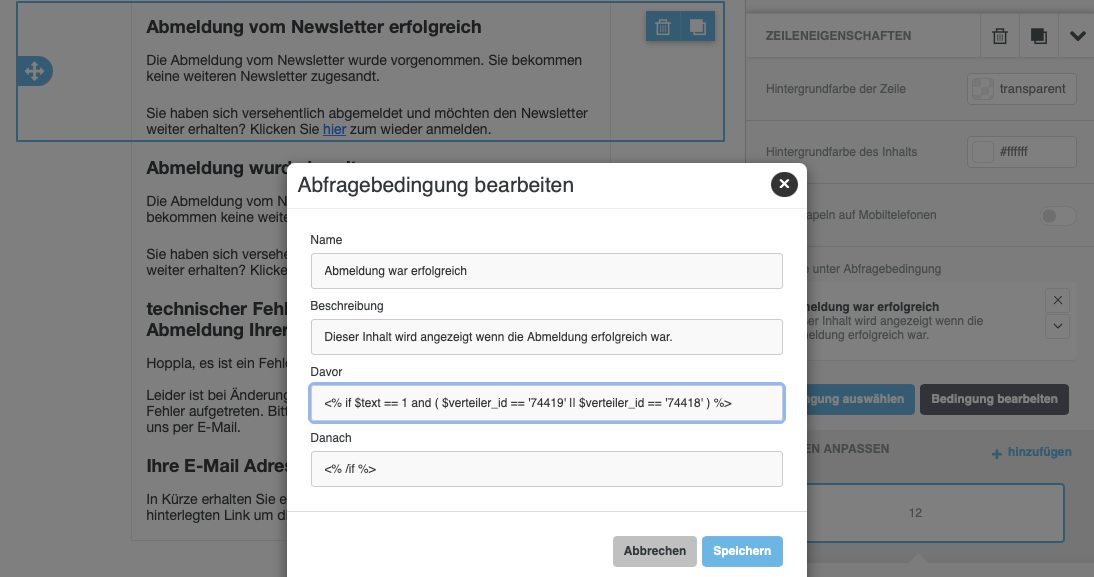
This content is shown if the unsubscription was successful ($text == 1) and the recipient is on list 74418 or 74419.
<% if $text == 1 and ( $verteiler_id == '74418' || $verteiler_id == '74419' ) %>
You will find the list ID (number) under Lists -> Management (opens in a new tab).